Wednesday, May 27, 2009

Observations after changing holes today

It was all hands on deck today attempting to get the place back into golf shape from the rain over the last couple of days. A total of 1.25" since early Monday morning has made the turf at our club grow rapidly. We brought all staff in on Monday morning to do a quick mow of fairways, tees, close rough and of course greens. Rain in the middle of the night stopped part of that work and some additional morning showers all but put a halt to everything except mowing the greens. The ground was very soft and wet yesterday so we stayed off the course until the early afternoon when we began to mow some rough. We allowed our greens to rest because they had been mowed for a number of weeks without relief with Monday outings, regular play and maintenance practices which required mowing.

In 1995 when the greens were resurfaced, a product called Profile was tilled into the greens. If you've ever attempted to till a flower bed or garden, you understand how easy it is to not get consistent tilling across the complete site or to get the products you are attempting to blend together in the proper ratios. Here is a link to learn more about Profile.

http://www.profileproducts.com/en/_docs/PPC%20Sell%20Sheet%20No%20Logo.pdf

This product was incorporated to reduce localized dry spots and to provide for more air space for our greens which do not have drainage systems under them. Localized dry spots are soils which are water repellent and are difficult to get wet. In many cases, these areas do not receive proper irrigation and or have a tendency to dry out quicker than other sights. Humps and bumps on greens and areas facing to the west have a tendency to drain or dry quicker causing this phenomenon. We incorporate a number of cultural practices to combat this issue:
  1. Aerify regularly to break up the soil profile and allow for water penetration.
  2. Use wetting agents which help the soil/sand accept moisture.
  3. Hand water greens or spray spots of the greens that we know have a tendency to dry quicker than others. We attempt to do this usually early in the morning because if you wait for the spots to show up in the heat of the day, it is difficult to get the spots under control before end of the day. We use a soil probe which allows us to pull out a small core of sand to determine if it has enough moisture. I have also used in the past a pair of polarized sunglasses which shows turf that is becoming stressed or is not as green as the turf around it. Sounds like a gimmick but it does work. It can drive your eyes a little crazy from the red coloration that you are bombarded with though.

Turf stress glasses

http://mvh.sr.unh.edu/mvhtools/psd_filters.htm

Localized dry spots FAQ

http://www.gcsaa.org/files/lds1.pdf

I have an email in to the company that manufactures the profile product to discuss potential issues with them. You can see the layering on this green is at the bottom of the tee. The orange material is the profile. This is at a depth of about 3" and is from a narrow ribbon width to sometimes 1/4" thick. Aeration over the years has helped to break up this situation somewhat but it is impossible to completely cover every spot on a green. Aeration can normally change about 5-10% of the surface. This product is to be blended thoroughly and is an additive to the greens mix. I believe the layering could create excessive amount of moisture at or directly above the area that is layered. Its interesting that when you pull a new hole out of the ground, many times the hole will break at this area of high concentration of material. In my mind this occurs because of the lack of strength in rooting below that area. No scientific proof, just a thought.


The picture below shows you the approximate width of this band of profile.


This is the view of a layer of material where the plug pulled apart while attempting to pull the new hole out of the green profile.


The following views are from a number of greens that were holding water from rain which had happened more than 24-36 hours ago.

The view below is of Green #11 which is one of our flatter greens. As you can see, the hole was almost completely full of water. Water mean less air space for roots which is not good. Water also is a great conductor of heat and cold. We hope as summer arrives to Glen Echo that we can control our water. Natural rain is great at times but we like to control the amount of water that is placed on our greens. The more moisture in the summer usually equals increased levels of heat that is held into our greens which can lead to catastrophic consequences for our shallow rooted turf. Good microbes which are used to help breakdown food for our roots are killed off and pathogens of all type begin to attack our green plant system.


This is the hand pump we use to evacuate water from the hole.


The view below is the level of water that I saw from about 4-5 greens.(1/2 to 1" of water) One green that surprisingly had moisture in it was #8. You would figure with the slope of that green that all of the water would have drained out by now.


Duck update

I have some good news to report about our baby duck situation. Assistant Mike told me that he has seen momma duck and two babies down in the area of the lake on 15. Sorry for the earlier report of a total loss of all our little mallards. Bad reporting on my part.

Sunday, May 24, 2009

Fairway Fertilization

This past Thursday and Friday, assistant Mike applied an application of granular fertilizer to our fairways. Our fertilization program for fairways will include this application which will make up about 40% of our fertilization on our fairways. We plan to use urea which is a common source of N for the rest of our fairway fertilization sprayed with our growth regulator applications sometime around the first of July. We will melt the granular urea down with water and will add a plant growth regulator at the same time. We will make about 5 sprayable applications throughout the summer to keep our fairways growth in control and to provide a supplement food source which should give our fairways some consistent growth.

We will be adding a product called Hydrexx to our Urea 47-0-0 fertilizer application which will be mixed in our spray tank with our primo PGR(plant growth regulator). This product reduces the amount of ammonium which is volatilized into the air.(Volatilization is when a fertilizer changes from its stable form to a gas form(ammonium). During this process, 15-20 percent of the fertilizer will be lost to the atmosphere if the fertilizer has not been stabilized. The use of the Hydrexx can be used at a couple of different rates which control the volatilization from 7-14 days. This also allows the nitrogen to be released slowly from 6-8 weeks or 10-12 weeks based on the turf's needs. I've copied a link below which discusses nitrogen volatilization in more detail for those who are interested in reading further.

http://extension.missouri.edu/publications/DisplayPub.aspx?P=WQ257

I've also copied a link to the Agrotain website regarding the Hydrexx product. While you are there, you might check out products called UFLEXX and UMAXX which are stabilized nitrogen products. UFLEXX is the 6-8 week slow release product and UMAXX releases in 10-12 weeks. The UFLEXX product is being used regularly in the home lawn care industry and both products are being used in the golf industry and other turf grass applications..

http://www.agrotain.com/turf/pdf/0109_HYDREXX_09SellSheet.pdf

Below are pictures of Assistant Mike applying our first granular fairway application of fertilizer.
The Lely spreader carries about 8-10 50 pound bags and can throw a distance of 45 feet or so.
Our tees and close zoysia approach areas to greens will be given the same product but will be spread by walking rotary spreaders because they are able to spread at closer range and will reduce any inputs to green surfaces. The product is then usually watered in to get it into the soil profile and prevent burn to the turf grass.


Tennis court update

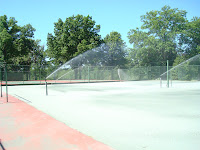
The crew has spent a lot of effort the past few days attempting to put the tennis courts back into play for this season. Approximately 8 tons of clay were placed back onto the courts, smoothed, watered in and then rolled at 2 ton increments. Weed spraying, calcium chloride application of 400 pounds used for hardening and helping to reduce the dust from the clay were put in place and about 1200 nails per court are being installed.(Yes 1200 nails, pass me the Ibuprofen) We have some additional work to do for Vince to insure that the courts are the way they need to be for our members and their guests. Here is a few pictures to show the remaining part of our work.
Giovanni emptying a 80# bag of clay into the drop spreader. You could take the spreader up to the other fence and back and would have to refill. We would place 50 total bags at a time between the two courts.


Giovanni pushing the spreader. The spreader works pretty well in applying an even application across the surface. This would take about 1.5-2 hours. We would then smooth the surface with the brush that the tennis staff uses on a regular basis. This would smooth the surface in preparation for irrigation after each application. We would then come back in after the irrigation had dried enough to use the asphalt roller which the club owns. This would take another 1.5 hours. We would then start the process all over again.


Once the clay application was accomplished, we had to place calcium chloride on the courts. Assist Mike helped apply the calcium chloride. A 50# bag would cover 1 court. Four bags were spread on each court with heavy emphasis of product placed on certain areas of the court that have a tendency to receive more wear and tear.


The completed look of 400 #'s of calcium chloride. Its not Christmas but it was pretty white from the material.


Irrigation after every application of clay and the calcium chloride. The courts are watered every evening during the regular season. Fungicide, weed and algae control products are placed on certain areas of the court to help protect the court. Yes, shade and trees do affect the tennis courts as well because of their shade.


Probably the most difficult or most nerve racking part of the job, laying out the lines. In golf, we like sweeping curves and not so tight geometric features like rectangles and square corners. You can see the army of nails awaiting my hammer on Sunday. From my best count, about 160 nails per approximate 40 feet. All I know is that the box that was full when I started is almost 1/2 empty from being used on court #2. Let's hope my lines are pretty straight and not too much redo but we will do whatever we have to do to make it right. All I know is that assistant Drew told me my second effort was much better than the first which we relined this morning.

Algae in Lake on hole #10

If you've been out to the course in the last week or so, you've seen the algae forming on the lake on hole #10. A yearly problem at Glen Echo. Our biggest problem with this lake is the fact that it is so shallow which allows the organic material(leaves and grass clippings) which has plenty of access to light to breakdown in the water causing the formation of the algae.
I also took this picture because of the two visitors in the background. We've had a couple of new wading birds on the property the last few days. I have not ID them at this time but will try to do so in the next few days or until they leave the property. With regret, the baby ducklings which were pictured a couple of weeks ago are no longer on property. I'm not going to guess what happened with them.
We will be treating the lake in the next few days with a microbial product which will eat away at the sludge and organic material at the bottom of the lake. This material is not available until around June 1st because water temperatures have to be high enough to sustain the microbes and allow them to do their work. Also, hopefully most of the heavier spring rains have begun to diminish which helps to keep the microbes in our lakes and not wash away off property.

We would like to do some light dredging in house with our backhoe and dump truck in the next few weeks to attempt to increase the depth slightly next to the shoreline. Ultimately, the lake system needs a complete overhaul to increase the overall depths of our lakes, improve the shoreline appearance and most importantly expand the irrigation lake on #15. Increasing of our capacity and ability to store water is very important. This type of investment in our property has a real return in not only lowering out potential fresh water costs but is an environmentally sound principle as well. This type of work is best accomplished in the late fall or early winter once the need for irrigation is complete. In 2009 with record high rainfall of all time, we spent
$ 45k in water. In 2008 during a year of pretty high temperature and a long hot dry spell in August, we spent around $ 110k for the season. It really pays to store your own water. It is also important for our staff to monitor our irrigation needs and keep the facility on the dry side for better plant health, playability and conservation of a very important resource.

Thursday, May 21, 2009

New Fescue/bluegrass green surrounds

I thought I would give you the before and after pictures of the sod work we did at the practice green and 18 green, 12 green, and 17 green surround areas. After the pictures I have a description of how the work was completed with pictures.

I haven't had a shot of Lady lately as you can see her patiently waiting for me. This is a view next to the practice green looking toward the road and the club house


Looking the opposite direction from the pictures above to the area between the 18th green and the planting beds.


13th green looking down toward the tee box. The renovated view is looking back up the hill toward the green. We had to replace some of the intermediate first cut of rough which is on the right side of the picture. The bermuda grass had been severly damaged by our bermuda eradication program.


The 17th walk off area is depicted in the two shots below.


The back part of 12 green was replaced.


PROJECT DETAILS
This past Tuesday, the crew began stripping away the sod from four different green surrounds. In the case of the practice green, it was a complete removal of all zoysia/bermuda grass that surrounded the green. We also removed the area between the practice green and the 18 green, 13 about 20 yards from the left side of the green up to the back end of the left side bunker, the back of 12 green and the walk off area on 17.
Below, Tom Lewis is stripping away the turf with a sod cutter.


This is a view looking from the main drive behind 18 green where all the sod has been stripped.
It took the crew about 5 hours to cut, clean and finish grade in preparation for the new sod.


The sod was then pushed into piles. Assistant Skip is doing the honors in this scene.
Much quicker using a piece of equipment to pile it up instead of removing it by hand. In some cases, we did remove some of the material by hand depending upon the location of the sod which needed to be removed.


Russ is working in one of those tight corners.


Nick has been working along the sidewalk edge manually removing the sod from the very edge of the sidewalk.


The loader was used to load up the material and it was then dumped into our single-axle dump truck. We hauled the material away to our dump area. The operator can set his bucket on the ground and the material can be pushed into the loader.


You can see the dump truck in the background and a cleaned and finish graded surface. We utilized the box blade on our tractor to smooth the area. We also use the bunker rake which does a nice job of smooth finish grading.


We then spread a starter fertilizer on the ground and then begin the sod laying operation. Starter fertilizer has a high phosphorus number which helps the plant establish a good root system. We decided to use big roll sod in this application because it saves man hours in the installation and would be less affected by warmer conditions. There are less seams in the sod which helps to conserve moisture. It only has a seam down the middle and where you are forced to lay another piece of sod or if the sod has to be cut for some type of reason. The turf comes in 40 yard rolls which are about 40" wide by about 105' long. When the sod is harvested in the field, it is wrapped in a plastic mesh which helps to hold it together. This mesh is very fine and can be torn with your hands. It has a 1" square pattern The turf is also grown with a plastic mesh which lays on the field after seeding and the turf grows up through the mesh. It strengthens the turf and helps to keep it together when it is harvested.
We removed the plastic mesh that the sod cutter put on the sod to prevent the material from getting caught in your spikes and tripping you. If the sod would get thin in areas or by chance would die, the mesh would then be exposed which could cause the potential tripping situation. We are rolling the sod out forward here but we changed to rolling it backwards. The operator can watch the sod being laid and keep a better line going backwards. If he is moving forward, he has to keep his eyes forward and cannot necessarily see what is going on behind him. If everything goes properly, you can roll out a 40 yard section of sod and slide it against the other pieces in about 5 minutes.


We laid about 600 yards of sod on Tuesday and the remaining sod went down yesterday. Our total sod use for the 5 areas we repaired this week was 33 big rolls at 40 yards each and 3 pallets at 70 yards each.


Wednesday, May 13, 2009

Wildlife

(I've tried editing the alignment for this post but something is not allowing my changes to take place. I apologize for this problem.)
A number of nice sightings in the last few days on the golf course.

I noticed bluebirds a couple of weeks ago between 12 and 13. I decided to check the nest boxes and hit the jackpot in the 3rd box from the bottom. 4 eggs. I did also see a nest in the box at the top of the row of nest boxes just below 11 tee. I will keep an eye on it for potential eggs.


I was driving by the small lake on 10 and saw this great site. 10-11 new mallard ducks floating around with momma.
Here they are doing a little dipping and diving for some food.
Swimming into the sunset away from Lady and I.
Assistant Skip called me the other morning and told me he spotted something on the wall of the pump house which faces to the west. The wall was probably warm from the day before and the evening got down into the upper 40's that night. Can you spot the brown object clinging to the wall?
Close up of what only a mother could love. Little brown bat stretched out and taking a siesta at about 10:00 a.m.
I went back after lunch and the little guy was gone. I know there are always concerns about bat's being rabid but I think they do our world a lot more good than bad. Our mosquito population would over run us if they weren't doing their thing at night.
Here is some more information on Missouri bats.

Tennis Anyone?

This season, the grounds crew staff is performing the work to remove the old clay from the tennis courts, replace with fresh clay, smooth, roll and place the tapes on the refurbished courts.
As I've made my trips by the courts the last couple of weeks, I've reminded my assistants of our need to begin this work. In a way, I was reminding myself. Well, today about mid-morning, our staff begin the effort to refurbish the clay tennis courts. As we continue our work over the next week as weather allows, I will post updated pictures of our efforts.

Below, you can see the loose or dead clay which must be removed.


Assistant Mike, Teddy, Armando and Giovanni are blowing the material into piles so it can be removed and hauled away.


Teddy is blowing the material to the end of the court. You can see the firm part of the surface in the foreground which will stay in place.


Teddy and Giovanni are scooping the material up and placing it into a wheel barrow. The material is hauled into the background where it was loaded into the front loader.


You can see the piles of material that need to be removed.


Updates early next week.

Wednesday, May 6, 2009

There's always something I've never tried

As you know, the area immediately off of our greens collars is worn and in some cases dead. In an effort to reduce any additional harm, we did something today that I have never done in 19 years in this great business. We placed a tarp on each end of our spray run to catch any spray which would hit the zoysia/bermuda areas. We were spraying the greens with a wetting agent which allows moisture to flow through the green profile and a plant growth regulator which will suppress the poa on the greens. This product is not labeled for warm season grasses such as zoysia and bermuda. This increased our spray time by 30 minutes and we had to use 2 additional staff members to assist in the operation. If this will improve our turf and prevent us from having to replace additional turf, it will be well worth the extra effort.

Below, you can see the plastic laying on the edge of the collar.


Assistant Mike as he is entering the green. He has already turned on the middle boom and the boom on the right side of the unit. The left side boom which is hanging over the edge of the green is about come on. You can see the edge of the zoysia which could be subjected to the unwanted spray.


Assistant Mike is passing off the green with the middle and right boom preparing to be turned off. You can see how the additional spray could be hitting the zoysia walk off area. He also must come to an abrupt stop because of the clock. The practice green is a very confined area because of the clock, the landscaped wall and the 2 trees which are within the 10 feet of the practice green.


You can see Mike as he has entered the practice green for his next pass.


Vertical mowing of greens

We've been trying to groom/vertical mow our greens on a regular basis. Yesterday, we did all 19 greens using our riding mower verticut units.

Vertical mowing has a number of benefits for our greens.

  1. Reduce thatch in the top layer of the green. Thatch is a combination of living and dying plant material which accumulates in the top mat layer of the green. Most greens should have approximately 1/2" of thatch(mat) which help protect the turf from injury and impact from golf balls.
  2. Incorporates sand into the thatch layer which helps with oxygen exchange and protects the crowns(growth center) of the plant. Oxygen allows the microbes to thrive in this layer which help in keeping the thatch layer broke down which allows for water penetration and the release of nutrients into the roots of the plant. Greens that have too much thatch have a tendency to feel spongy when you walk upon them and will ball mark rather severly.
  3. Bentgrass by its very nature will prefer to lay over to the side. Turf that is laid over will become long creating more surface area for the ball to roll upon which then creates drag on the golf ball. The old Johnny Miller phrase grain which speaks to the direction the turf tends to grow or lay over. In most cases in tournament golf, cutting heights are so low and tight that grain very rarely exists to any extent. We want the turf to stand up straight so it will be cut cleanly and consistently. Topdressing sand will be able to be worked around the upright grass blades which reduces fricton on the ball which increases speed.
  4. Bentgrass will also rejuvinate from the slicing action that the verticutter uses to do its work. There are over 2500 grass plants per square foot which can become very tightly compacted in time.

Below is a one inch plug which I took out of one of our greens this morning. The top or turf side is to the left and there is about an 1 1/2" of soil on the right which make up the base of our greens. Between the surface and the soil is a sand layer which varies from 3-5 inches from green to green at our facility. We have near 1" of thatch which is ok but needs to be controlled. Regular topdressing, aerification, vertical mowing and control of fertilization will help in keeping this material from expanding any further and will hopefully reduce the amount of thatch we have on our greens in the future.


The picture below shows the vertical mowing lines and how the turf is forced to stand tall.


Assistant Mike is using the vertical mower without baskets to incorporate the sand that is being pulled up back onto the green surface. As Nash had questioned the other day about going a different direction, we do try to alternate the direction from time to time which will assist in reducing the amount of grain in our greens. We also change our mowing direction daily to help in reducing grain in the turf.


Close up picture of the vertical mowing blades. The units are set to a depth below 0" so that it will cut into the surface of the turf. Each blade is seperated by about 5/8". As the unit moves forward on the green, the hydrallics of the system turn the unit which then allows it to cut into the surface of the green.


This is a view of the complete unit. It is the same size as our mowing units which can be placed on the same mower.


Assist Skip is putting a light topdressing on the green so it will help with smoothing our surfaces and allow the sand to move into the profile of the vertical mowing.


We then took our cocoa mat drag to our greens across the direction that we would mow which would stand the turf up further and they would be mowed with a normal mowing unit.